One of the questions I got after sharing the Data Center in a Bag project was whether Kali Linux could run from the travel kit.
That sounded simple enough.
The original thought was just to see if Kali could be added as another service.
It turned into a little more than that.
Instead of spinning up another full virtual machine, I decided to see how useful Kali could be as a Docker container running on the Ubuntu VM already inside the travel environment.
The goal was not to build a full graphical Kali desktop.
The goal was to build a lightweight, persistent security and troubleshooting box that I could reach from anywhere inside the travel network.
Starting With the Official Kali Image
The base image came from Kali’s official rolling Docker image:
kalilinux/kali-rollingThe first version was intentionally simple.
The container started with a shell and a persistent volume so I could begin installing tools and testing connectivity.
Inside the container I added a headless Kali toolset along with some utilities I knew would be useful for networking and troubleshooting.
That included:
kali-tools-top10
iproute2
iputils-ping
dnsutils
traceroute
curl
wget
net-tools
tcpdump
openssh-client
openssh-server
sudo
This gave me tools like Nmap, tcpdump, DNS utilities, traceroute, SSH, and the rest of the normal Kali top tools without needing a full desktop environment.
Giving Kali Its Own IP Address
At first, Kali was just another Docker container using a normal Docker bridge network.
That worked, but it meant Kali was effectively hidden behind the Ubuntu host.
I wanted it to behave more like a real system inside the protected network.
So I created a Docker macvlan network tied to the Ubuntu VM’s network interface and assigned Kali its own address:
10.20.20.30That put Kali directly on the protected pfSense LAN alongside the rest of the environment.
The layout now looks roughly like this:
10.20.20.1   pfSense
10.20.20.2   AdGuard
10.20.20.3   Firezone
10.20.20.10  Linux Mint
10.20.20.20  Ubuntu / Docker
10.20.20.30  Kali
From that point on, Kali became its own device rather than just something I accessed with docker exec.
It could route through pfSense, use AdGuard for DNS, and communicate with the rest of the protected network normally.
Making the Tools Persistent
One of the first things I ran into was normal Docker behavior.
I installed all of the tools manually inside the container, redeployed the stack, and immediately discovered that the installed packages were gone.
The persistent volume kept the contents of /root, but packages installed into the container filesystem did not survive recreation.
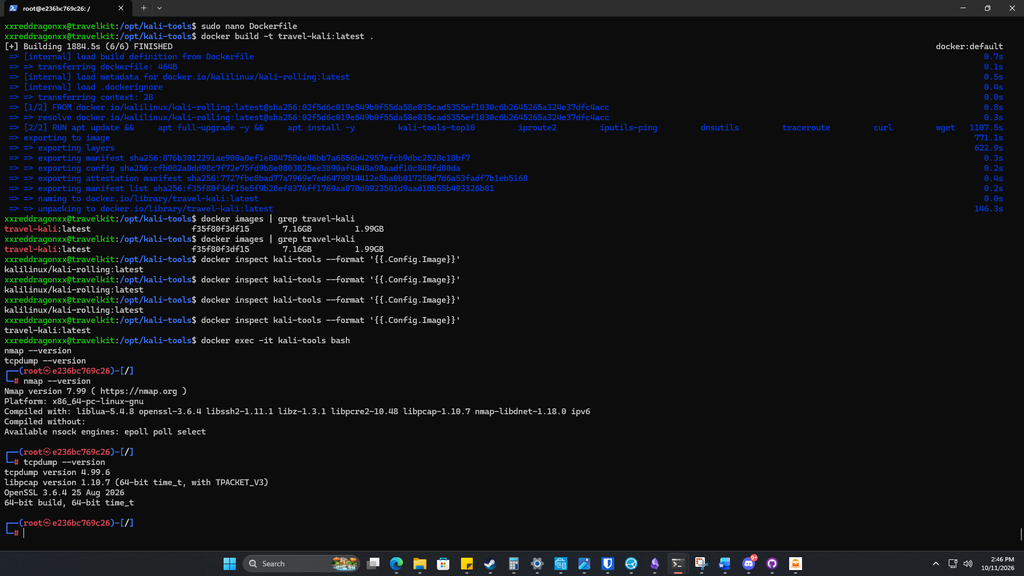
So I built a custom image.
Instead of using the stock Kali image directly, I created:
travel-kali:latestThe Dockerfile installs all of the tools during the image build.
Now when Portainer recreates the container, the toolset is already there.
No reinstalling Nmap.
No reinstalling tcpdump.
No rebuilding the environment manually every time.
That was one of the biggest improvements to the setup.
Adding SSH
Once Kali had its own address, the next step was making it accessible without logging into the Ubuntu host first.
I added OpenSSH Server to the custom image and configured the container to start sshd automatically.
I created a normal kali user, added sudo access, and disabled direct root SSH login.
From there I added a pfSense rule allowing SSH from the Opal LAN to:
10.20.20.30:22After that, I could connect directly with:
ssh kali@10.20.20.30The interesting part was testing it from the iPhone.
Since I wanted the travel kit to remain usable from mobile devices, I kept password authentication available instead of requiring SSH keys only.
That lets me connect to Kali from a phone, tablet, laptop, or anything else sitting on the travel network.
Making the Login Survive Redeployments
The user account itself was baked into the custom image, but passwords normally live in the running container’s /etc/shadow.
That meant a complete container recreation could reset the login.
To solve that, I moved the Kali password into a protected file on the Ubuntu Docker host and had the container apply that password when it starts.
The password is not stored inside the Dockerfile or hardcoded into the image.
That means the container can be rebuilt or recreated and the login still works.
Packet Capture Capability
Since Kali is meant to be a security and troubleshooting box, packet capture was important too.
With tcpdump installed and the container given the required network capabilities, it can capture traffic directly from its interface.
For example:
tcpdump -i any -nnor targeted captures like:
tcpdump -i any -nn host 10.20.20.20It is important to remember that Kali only sees traffic that reaches its interface.
For traffic crossing pfSense, I would still capture directly on pfSense.
But for troubleshooting connections to or from Kali, it works exactly as expected.
What This Adds to the Data Center in a Bag
The Data Center in a Bag now has a dedicated security and troubleshooting system built directly into it.
Instead of carrying another machine or dedicating another VM, I now have a lightweight Kali environment that can be reached remotely over SSH.
It has:
- its own IP address
- persistent tools
- direct SSH access
- pfSense-controlled access
- DNS through AdGuard
- routing through the protected network
- packet capture capability
- access from laptops and mobile devices
And because it runs as a container, the resource footprint stays much smaller than a full Kali VM.
The Bigger Lesson
This one started because someone asked whether Kali Linux could run from the travel kit.
The answer ended up being:
Yes.
And not just as a disposable shell.
It can run as a persistent, independently addressed security toolbox inside the Data Center in a Bag.
That is probably the part I like most about this project.
Every time I think the build is close to finished, someone asks a question that creates another idea.
Part 8 will move back to the firewall side of the project and focus on VPN and policy-based routing through pfSense.
The Data Center in a Bag keeps growing.